Outfitting an RV
Once you have purchased an RV, the next task is to get it outfitted with all the stuff that you think you need for camping and traveling. As I can attest, it is much too easy to grab a cart at an RV supply store, walk down the isles putting more and more stuff into your cart, and then choke in shock when the cash register seems to be telling you that you owe more than $1,000!
So lets step back for a moment, and start with the necessities, and worry about the goodies later on. Lets also concentrate on the RV, and not worry about all the other goodies that are required when you are towing a vehicle. We will get to that later. Let's assume that you are a new RVer and dont have the usual accumulation of stuff, so you are basically starting from scratch.
OK, grab a cart, and lets begin. The first things you are going to accumulate are the necessities to make the ladies happy—water and power when you finally get settled in a nice camping spot in an RV park. (We will talk about boondocking later on.)
Electrical Items
The first item you should put in your cart is an extra 25-foot electrical cable. (Most RVs come with a 25-foot power cable, but occasionally it is not long enough to get to the RV park power post.) If you have an RV with 30 Amp electrical service, then you need a 30 Amp extension cord with the proper RV connectors already on it. (You wont find this item at your local hardware or home improvement store.) Often, you will find RV parks where the electrical post is much too far to the rear of the coach, and a standard 25 foot power cable from the coach wont reach. (You wont use this extension cable very often, but when you need it, it is a God send.)

You are also urged to get an adapter that plugs into a regular 120 volt receptacle and allows a 30 Amp RV plug to be connected to it. (Some of the really old RV parks dont have 30A receptacles on the electrical posts, and this adapter will allow you to plug into a regular receptacle and at least get some lights and the microwave fired up—but dont try to run an air conditioner on this setup.) This adapter also can also be used while you at home to provide limited electrical power.
I also carry, as a convenience, an adapter that allows me to plug into a 50 Amp receptacle on the RV parks electrical post and then plug my 30 Amp power cable into the adapter. I have found several instances where a newer park did not have any of the older 30 Amp receptacles. By having both adapters, I can always get electrical power in an RV park.
I also prefer to spend a little extra money and get a plug-in voltage/polarity tester that tells me if the RV parks electrical receptacle is wired correctly (surprisingly, some are not), and it also gives me an idea of what the park voltage is. (If the park voltage is low, refrain from using your air conditioner.) If you find that the electrical receptacle on the post is wired incorrectly, do not plug your motorhome into the receptacle! Inform the office of the problem and then request a different site. (This miswiring does not occur too often, but the little time it takes to check the electrical post is well worth the effort, and can save you thousands of dollars in damaged electrical items.
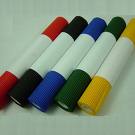
So that I am prepared for almost any electrical situation in an RV park, I carry three electrical adapters in my RV:
- 30A to 20A—used to plug the voltage tester into the 30A receptacle on the RV site power pole.
- 20A to 30A—used to get power to the RV when only a regular 15/20A 120V receptacle is available at the RV site power pole.
- 50A to 30A—used to get power to the RV when only a 50A receptacle is available at the RV power pole.
(Some RV parks are set up so that two sites share the same power pole, and usually have 20A, 30A, and 50A receptacles. I always seem to arrive after the other RVer has already used the 30A receptacle, so my 50A-to-30A adapter does see some use.)
Water Items
The next items to pick up are two 25-foot lengths of RV water hose. This hose looks just like a regular garden hose, except that it is white in color and is manufactured so that it wont flake on the inside and put lots of little rubber pieces in your drinking glass. This type of hose is meant for potable water (usually referred to as drinking water). Normally, you will only need one of these 25-foot hoses for your RV park connection, but there will be times when you need both sections to get a workable water connection. If you have a choice, get the 5/8 hose instead of the 1/2" hose.

Now you need to get a water pressure regulator, so that you never have more than 40 or 50 lbs. of water pressure getting into the plastic piping of your RV. The cheapest (and quite acceptable) regulator is a brass regulator (preset at 40 psi) that has no pressure gauge on it. It will work just fine for most situations.
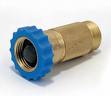
If you have a larger motorhome with a walk-in shower, you may want to, instead, install a water pressure regulator meant for a house, and set it for 50 psi. This setup will give you a decent flow for a shower while you are in an RV park. The small brass regulators have too much flow restriction in them for most people to get adequate flow for a descent shower.)
It is suggested that you pick up a water filter for your water connection. These filters are usually in-line filters that have hose connections on each end. The filter should be installed so that water from the RV site is filtered before it enters your RV water connection.

For those of you who have good piped-in city water at home, you should not use this filter when you are filling your RV fresh water while at home. The chlorine in the city water helps to control bacteria.
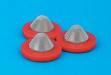
If your water regulator and water filter do not already come equipped with hose washers that have a small mesh screen in them, be sure to pick up some screen-type hose washers.
For those of you who have a fifth-wheel trailer or a travel trailer, you might want to also pick up a special "tee" that allows you to have an extra water spigot (aka a hose bib) right at your trailer's city water connection.

While still in this section, you are advised to also pick up a short length of water hose, any type will do—to be used for rinsing out your sewer hose.
Sewer Items
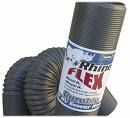
Your next stop is to get the proper sewer hose and fittings that you will need. This is not the time to go cheap and get the least-expensive sewer hose. You are well advised to get the heavy duty sewer hose (one that is not going to abrade easily and wear out too fast —always breaking at the most inopportune time)! Here again, get at least two sections of good quality sewer hose and the connector to put them together.
You are also advised to get a 45-degree elbow made out of clear plastic, so that you can visually tell when your black and gray tanks are empty. (We will cover this subject in greater detail later on in this seminar.) This elbow fits on your RV drain fitting, and your sewer hose then attaches to this fitting.

You will then need to pick up a fitting that attaches to your sewer hose and then fits into the sewer connection at your RV site. Usually these fittings are 4-inch threaded fittings, but some are only 3 inches. You can buy an adapter that will work for either the 3-inch or the 4-inch pipes.
Next, you should pick up a sewer hose donut—a large rubber ring that helps to seal out sewer gas when the sewer connection is not threaded and is simply an open pipe.

Some states and parks require that you have a water-tight connection between your sewer hose and the sewer pipe fitting. If your threaded adapter will not seal properly, you will need to use the donut to achieve a tight seal.
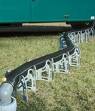
Also be aware that some states and municipalities require that your sewer hose be fully supported and slope downward from your RV connection to the site sewer fitting. You can make a support out of cut down plastic piping from your local building supply dealer or you may also buy different types of sewer hose supports at an RV supply store.
 |
|
 |
You should know that many RV parks do not provide a sewer connection at your site, but simply provide a dump site somewhere in the park. If this is the case, dont plan on long, hot showers of any length—since your gray water tank will be full long before you are ready to break camp. Just about every RV park provides some type of bathroom/shower facilities for their guests.
You may wish to purchase a wand (sometimes referred to as a "swizzle stick") that you poke down the throat of the toilet and attach to a hose for blasting out some of the yuk that may stick to your black tank. However, you will soon find that this is a royal pain in the rear, is messy, and really isnt needed most of the time—if you empty your black tank the proper way (which we will be discussing later on).
While you are still in the sewer section you may also want to get some packets of toilet chemicals that help to break down the solids. You can find chemicals in either powder packets or fluid in bottles. Avoid getting those chemicals that have any formaldehyde in them, since many RV parks dont allow formaldehyde products to be dumped into their septic systems. (Many RVers find that they can do just fine without using any chemicals at all, if they regularly dump every three or four days. The choice is yours.)
You Don't Need Special TP. Let me take a moment and talk about that most basic of necessities—toilet paper. Please dont be misled into thinking that you have to spend the extra money to buy special RV toilet paper. RV TP is a lot more expensive than what you find in the local grocery store. While you are shopping for groceries, simply read the TP labels and find one that says safe for septic systems. Now-a-days, as opposed to ten years ago, almost any single or dual-ply TP that you find in the grocery store will work just fine in your RV.
 If your lady has a particular brand of TP that she insists upon using, simply put a sheet
of it in a jar of water and let it soak for a minute or two. Then, shake up the jar and the
TP should dissolve into little pieces. If that is the case, then her favorite brand of TP
will work just fine in your RV.
If your lady has a particular brand of TP that she insists upon using, simply put a sheet
of it in a jar of water and let it soak for a minute or two. Then, shake up the jar and the
TP should dissolve into little pieces. If that is the case, then her favorite brand of TP
will work just fine in your RV.
TV Items
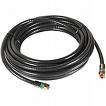
Many RV parks provide a cable TV hookup right at your RV site. You may want to pick up either two 25-foot coaxial TV cables (and an "F-type bullet" to connect them together) or one 50-foot cable. I suggest that you get RG-6 cable (and not the older RG-59 cable), so that you can also use this same TV cable if you later get a satellite TV system.
 |
|
 |
For all my utility connections, I prefer to have the shorter lengths of cables and hoses stowed right in the utility bay, and have the extra, seldom used, lengths stowed in another bay, where they can be retrieved when they are needed. However, due to space limitations, I stow my sewer hoses in a different bay, since they are more bulky and not used nearly as often.
If you know that you are going to be using a satellite TV system in your RV, then there are a few more items to get while you are in the TV section. (If you have a roof-mounted satellite dish and will always be using it, then you are finished in this section.)
If you know that you will be using a portable satellite dish (that you have to set up and aim) to get satellite TV reception, then you should get a portable satellite dish (if you don't already have one at home).
You will also need a compass for finding the correct azimuth setting for your dish. Just about any compass will work just fine.
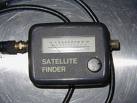
Unless you enjoy a sometimes very frustrating experience, spend a few extra dollars and buy a Satellite Finder meter and a short length of RG-6 coax and a bullet—so that you can peak the aiming of your dish by watching the meter and not having to listen to the navigator shouting sometimes unintelligible instructions.
 |
|
 |
How to properly aim a portable satellite dish is covered in another section of this web site.
Miscellaneous Items
At this point, you have accumulated the real necessities to get you set up in an RV park site, but there are some additional items that I recommend you have on hand.
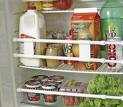
Refrigerator Bars. Before you travel down the road with your refrigerator stuffed with goodies for your trip, your lady will be much happier when she gets to your camping spot if she has put retaining bars in the front of each refrigerator shelf to keep things in place on the shelves as you bounce down the road and around corners on your way to your favorite RV camping site. These bars come as a single bar or as a double bar— both with rubber tipped ends and with one end spring-loaded, much like a portable curtain rod. Be sure to get a bar for each shelf in your RV refrigerator.
 |
|
 |
Level. A nice-to-have tool is a small level for checking whether your RV is level enough to be comfortable. Dont trust the indicators on your hydraulic levelers. Have your lady set the level on the counter, or preferably right in the center of the refrigerator. I prefer a 6 torpedo level, rather than one of those small round levels that has one bubble for both directions.
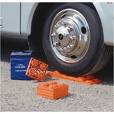
Jack Pads. Some parks insist that you have jack pads beneath your levelers. You can buy these at an RV supply store or simply make them out of pieces of 1 or thicker plywood. I made four one-foot-square pads by gluing two pieces of ¾ inch plywood together.
Leveling Blocks. If you have an older motorhome that does not have levelers, you can also buy plastic leveler blocks (that look almost like adult-sized Legos). Just as easy, however, (and cheaper, too), is to make some yourself out of pieces of 2x6 with one end cut at a 45-degree angle. However, be sure that you make enough pieces to support both rear dual tires (left or right side) at the same time, not just one tire of each set. You should make enough pieces to have three levels of 2x6 for one side of your RV (many RV sites are not very level).
Toilet Brush. Your lady will definitely want to get a small toilet brush and storage container. (This is one of the most important items to put in your RV!) RV toilets do not have as much standing water in the bowl, and your deposits will almost always leave an unsightly smear in the bottom of the bowl. (We will talk about a possible cure for that situation later on.)
Outdoor Floor Mat. A small floor mat is usually appreciated by the ladies, so that everyone can wipe off their usually dirty feet before ascending into her spotlessly-clean RV.
Anti-Slip Material. It is a good idea to pick up at least two rolls of rubber anti-slip material. You will be using this in most of your drawers to help keep things in place while you are on the road.
Also pick up about six of the heavier anti-slip placemats, in whatever color the lady of the house chooses. You can use two for placemats and then cut the others up to use to keep stuff in place.
(We travel with a small basket containing all our condiments and napkins right on the dinette table—a piece of cut-down placemat making it stay in place while we travel. This trick also works well in the kitchen and bathroom areas.)
(We also had a problem with the bed mattress wanting to always slide forward, but after we put four of the more heavy rubber anti-slip placemats under the bed, the mattress now stays in place.)
Good Fire Extinguishers
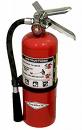
Nothing is more sad than to drive down the road and see an RV quickly going up in flames, while the owners stand by helplessly. I strongly urge you to purchase two five-pound fire extinguishers that are rated for Class ABC.
The greatest fire risk in an RV is from a leaky gasoline line in the engine compartment. One extinguisher is usually not enough to put out such a fire, but having two good extinguishers on hand gives you a good chance of putting out a small fire before it destroys your RV. Dont forget this important item!
And, please, dont stow the extinguishers in a basement compartment out of easy reach. Keep both fire extinguishers right behind the drivers seat or someplace where they can be grabbed and used in a hurry.
It is also a good idea to have a small extinguisher in the kitchen where the cook can get to it readily in case of a grease fire.
A more in-depth discussion of fire extinguishers and how to properly use them can be found in the Emergencies section of this Web site.
